
How to Make Pumpkinhead Shrinkies
Making tiny plastic charms is easy when you know how!
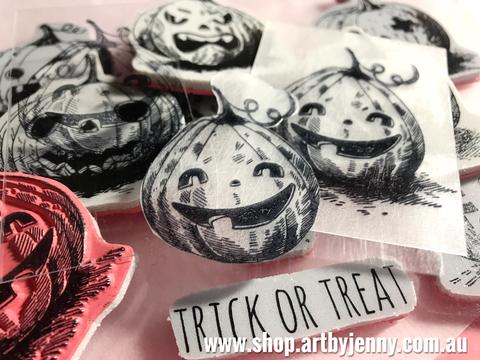
To make teeny tiny Pumpkinheads for Halloween I used Tim Holtz Stamps - Pumpkinheads, Shrink plastic (like Shrinkie Dinks), StazOn ink pad, Watercolour Pens, sharp scissors and a heat tool.
Basically, place your favourite Pumpkinhead (or 5) onto an acrylic block, ink the stamp and print onto the plastic. Trim around the image, add colour and then heat to shrink. That's the short version!
Always follow the instructions on the pack of the shrink plastic. While most instructions say to use an oven, a heat tool can be used for small creations like these. Always be careful when you're using heat :)

Shown above from left to right: Pumpkinhead stamp, clear shrink plastic and presanded shrink plastic.

I used StazOn black ink then trimmed the pumpkins with sharp scissors before colouring.

The clear plastic is best coloured with permanent markers (Copics, Chameleon Pens), while the sanded plastic is great with anything including pencils and watercolours.
I used watercolour pens on both :) It beads on the clear plastic but still adheres to the plastic when shrunk. The colours blended well on the sanded plastic.
I also added white Sharpie to the eyes :)

Pumpkinhead is shown above on presanded plastic waiting to be shrunk.

Here are the finished pumpkins... they shrink to about a third the size while atthe same time, the plastic gets thicker.
The top pumpkinhead in the photo is the clear shrink plastic, while the orange one is the presanded shrink plastic.

This photo shows both tiny pumpkinheads next to a full size untrimmed Shrinkie and the original cling stamp. Aren't they totally adorable :)
Sing out if you need help or have questions.
Happy Creative Day!