
Blah Blah Blah - Stopping for Tea and Art - Journal Page
Blah bLah blAh. blaH Blah bLaH blah blAh... Blah.
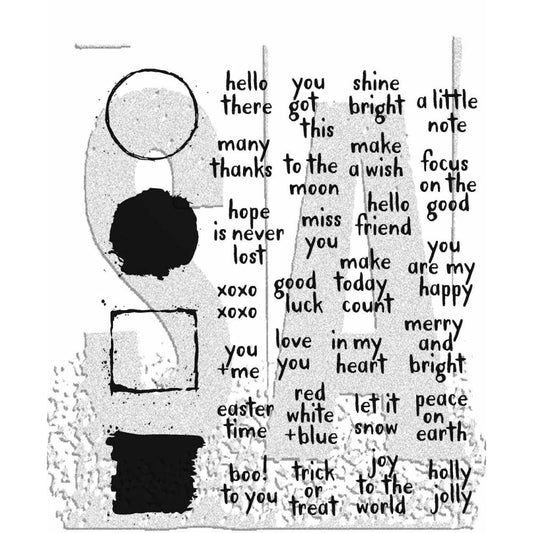
What more can I say? lol :) fabulous words from Dina Wakley MEdia Bold Collage Tissue 😂
This is my favourite sheet of wisdom from Dina Wakley MEdia's 'Bold' Collage Tissue! Love it, it is brilliant! Thankfully we get two in every pack! Blah bLah blAh is perfect for all the days, especially those that are snailpaced challenges. 🙄 We all have those kinda days!

These two girls are so tired of all the Blah bLah blAh that they have fallen asleep while sitting up, no time for winding keys or falling down rabbit holes today! At least they now have time to drink their tea before it goes cold! lol :)
How to make this page ...

Start with a background of inky colour. I'm using my Dina Wakley MEdia Watercolour Journal with the blue customisable cover with Dylusions Ink Sprays.
Top left ... spray two opposite corners using 'Margarita Bucket', a vibrant bold purple.
Top right ... spray the other two corners using the ultra bright pink 'Tropical Sangria' and then spray across the middle-ish with the beautiful neon red 'Strawberry Daiquiri'.
Bottom left ... while the ink is still juicy, pick up the book and hold up to create long horizontal drips. Tip back the other way to encourage to ink to flow back the other way. Dab off any excess.
Bottom right ... lay the book flat on your desk to let air dry or use a Ranger Heat-It craft drying tool to blow hot hair over your background until it is dry.

Stamp out your characters onto mixed media or smooth hotpress watercolour paper using a water-resistant ink like the Ranger Archival Ink Pad (in Distress Black Soot, Dylusions Black Marble or Jet Black), Versa Clair Nocturne or StazOn Paino Black.
Dylusions stamp sets used ... Funny Bunny (seated body), Clockwork (seated body with owl), Let Them Eat Cake (heads, quote), The Bolder The Border (rectangle rocks to sit on).

Using the same ink pad, stamp across the base of the page to add something for the girls to sit upon, like some rectangle rocks! Using a very fine black marker, draw a handle on the cup.
Cut all your characters out with Tim Holtz Recoil Snips (sharp pointy, ergonomic spring-loaded scissors). Put the pieces aside.
If you have unboxed your Brother Scan n Cut or Cricut, why not use it for trimming around everything, especially if you have trouble using scissors or craft knives.

Tear up a sheet of blah blah or another tissue paper design with small patterns, abstract or text. Using Distress Collage Medium, Dina Wakley MEdia Gel Medium or your other favourite matte gel medium for adhering tissue paper.
To do this, pop the torn tissue on a craft mat and brush on matte medium all over the back of the tissue paper.
Lift the wet tissue gently and place it over the page, being careful not to keep moving or lifting it too many times! Wet tissue has a mind of it's own, tearing where it isn't useful and lifting off colour.

As the tissue dries, it merges into the background and the white paper seems to disappear.
How well this happens (for me) depends on the weather, my mood, how much matte medium I've used or simply how I've let it dry - air dried (ie, leave it alone and do something else), pop on the floor in front of the heater, using the Ranger Heat-It tool, sit it in the sunshine outside during summer (ideally where the chooks cannot reach). Results with layering tissue for me is quite varied, even when I do the same thing twice! ha ha ha
However, it is only Art and all results even dodgy ones are acceptable :) No mistakes, no rules, only wonderful times!

The above photo shows how I've torn up and layered half a sheet of Blah bLah blAh along with some other abstract marks this fantastic packet of Dina tissue called "Bold".

To add to my spiralling thoughts of omg, it is so pink, I stenciled actual spirals! In pink! lol :) I quite like pink these days, it goes beautifully with orange, green , purple, grey, black, white, yellow, red and blue! lol
Anyway! Using the large Dylusions stencil with oval spirals 'Down the Rabbit Hole', blend pretty pale pink spirals in pale pink 'Cotton Candy' Dylusions acrylic paint.

Ensure everything is dry before tracing around the spirals on one side in white Posca or Sharpie acrylic paint markers.

I tend to glue on my characters before colouring, then I can cart the book into the lounge room or local cafe for colouring without anyone escaping. I use glue stick for basic shapes and the Dylusions or Dina Wakley white papercraft glue for everything, particularly the teabag strings and other tiny pieces as it is fast drying and has a fine nozzle, great for thin lines of glue.


In the above photo, you can see where I've stamped the 'blah!' word from Dina Wakley MEdia 'Regal Bears'. I stamped it in all the gaps down the centre of the page.

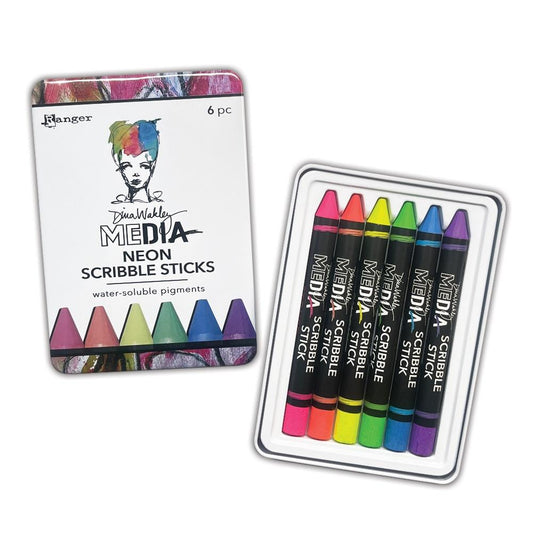
The above photo shows the colours of arty treasures I've used for colouring, doodling, mark making.
I've coloured the stamped images using Tim Holtz Distress watercolour and Derwent Inktense pencils, colouring in with dry pencils and blending with my waterfilled water-brush.
I painted in extra neon tones (Dylusions Ink Spray Mango Punch, Tropical Sangria) over the teacales, sweets in their hats, eye patch and bottle of tea.


It hasn't photgraphed well this time, however there is a splash of Dylusions Stickles sparkly clear glitter glue on the spiral lollypops in their hats! And afterwards, I added Stickles to the shoes, eyepatches and candy canes!
Thank you so much for visiting and reading this crafty blog post! May your days be full of joy (crafty arty moments) with good health, peace, craftyness, laughter, love and more Art, lots and lots of Art!
Happy Creative Day!
🌀🎨
Jenny