Gypsy Art Journal Page
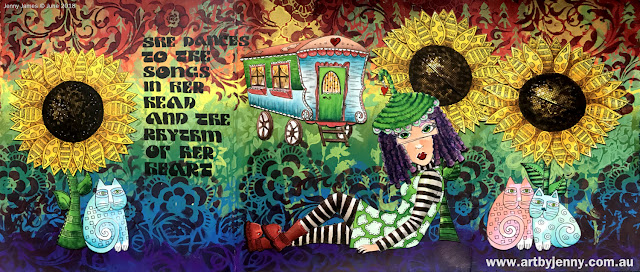
Life of a gypsy has always appealed to me... living in a gorgeous wagon drawn by a huge, friendly Clydesdale horse, with beautiful surroundings and a peaceful lifestyle - nothing but painting, drawing, crochet, embroidery, colouring and reading. A world of happy, friendly animals and wildlife. Of course my cats wouldn't hurt a fly so they're able to hang out with me in the sunflower garden (birds, frogs and lizards feeling totally safe of course! lol).
The theme was "Gypsy" and was part of the Australian Art Journal Swap.
Here's a quick reference list of treasures to make this page...
- Dylusions Mixed Media Art Journals
- Strathmore Paper Pad - Mixed Media - Series 400
- Dylusions Acrylic Paint
- Ink Blending Tool - Mini Round
- Ink Blending Tool - Mini Round Replacement Foam Pads
- Acrylic Stamping Blocks
- Tim Holtz Stencils
... Pines, Heartstruck, Leafy, Feathers, Flourish, Wildflower, Blossom, Lace, Trellis
- Studio Light Stencils, Flowers
- Dyan Reaveley by Dylusions Stamps
... Sunshine Girl, Everything's Rosy
- Laurel Burch Stamps
... stamps with cats, dogs, horses and mermaids to be added online soon :)
- Kuretake Hikkei Double Ended Brush Pen
- Ranger Black Archival Ink Pad and Reinker
- Jane Davenport Mermaid Markers
- Ranger Wonder Tape Double Sided Adhesive
If you need a hand finding anything or would like to order something, sing out anytime :)
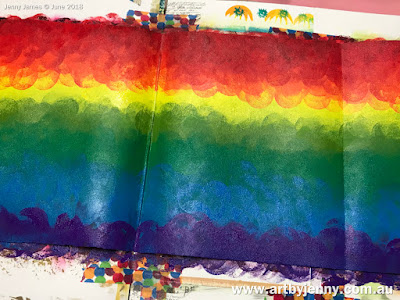
I started the page by painting a Dylusional Rainbow. I used a Ranger Ink Blending Tool and at first, painted strips of colour across the page but got quickly tired of the long lines. Dabbing made the colours appear to blend (they just overlap) and was easier to fix when I went overboard.
Amazingly enough, I didn't make a huge mess on the backs of the pages but I have learnt it doesn't matter (really it doesn't) because a mess can give your next page a wonderful start.
The colours used were : Postbox Red, Tangerine Dream, Lemon Zest, Cut Grass, Dirty Martini, London Blue, Calypso Teal, Crushed Grape for the initial rainbow, then layered using Tim's stencils with Lemon Zest, Pomegranate Seed, Mushy Peas, Crushed Grape and After Midnight.
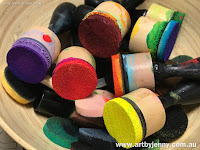
The pic to the right is just to show what the ink blending tools look like. They're wooden handles with Velcro to hold the found pieces of dense foam. Washable and reusable :)
I use them just like I use sea sponges - dabbing, smooshing, blending, spotting, dusting, swirling, whatever the hand and paint want to do. I used to also use those house painter's foam rectangles till I discovered the world of Ranger! They were more furry than foam... meant for fast, drip free wall painting.
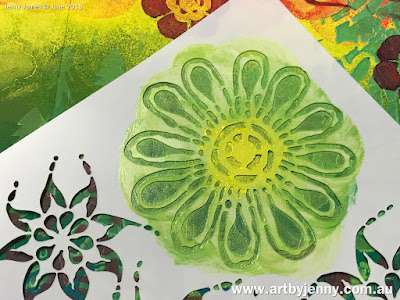
I used a variety of stencils by Tim Holtz (wildflowers, blossoms, trellis, lace, flourish, pines, heartstruck) and Studio Light (above)...
Its usually recommended that less is more when using paint with stencils. Too much paint and it can leak underneath the plastic, giving you a less than perfect design.
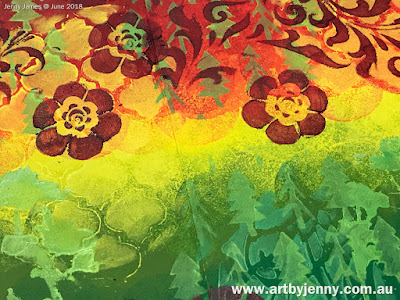
Above shows how heavy handed I am with paint! lol :) If you saw a closeup of someone else's artwork, you'd see even coats of paint without those edges, borders, bumps and messes.
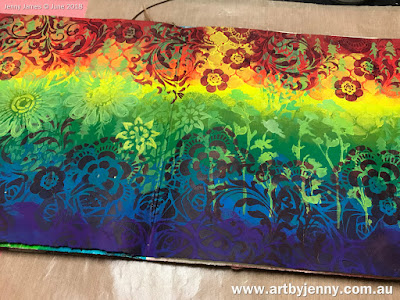
An overview of the background as its drying. See? Much nicer than my spotty rainbow :) Love the colours!
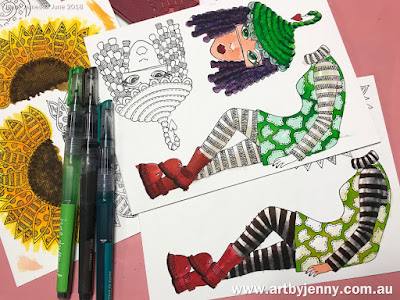
Inbetween the different layers of the background were drying, I stamped, coloured and cut out my collage pieces. I was itching to use Dyan Reaveley's gorgeous new stamp set "Sunshine Girl".
I've never felt so attached to someone else's design before :D She's just like me! lol :) I wear shift dresses over leggings and long sleeved shirts, short boots (always wanted red ones), have a beanie that is just like that hat (Mum made it years ago - she called it my Wee Willie Winkie Hat) and I have purple hair (used to be curly and have always loved ringlets). Naturally purple of course :)
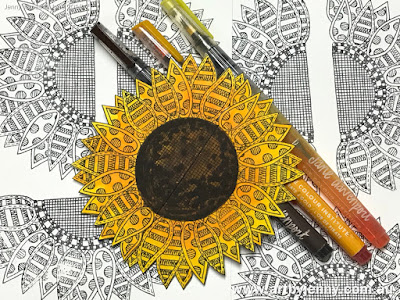
So anyway, as usual these days, I reached for those Mermaid Markers of Jane Davenport's. My greens and yellows are running out too! Lucky I know where I can get more :)
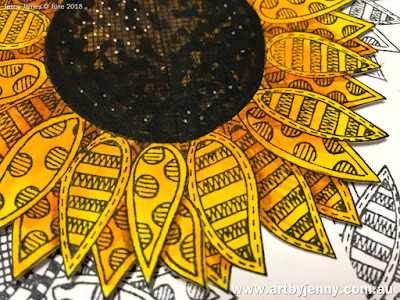
The gorgeous dark brown in the centre of the flower is made up of yellow, green, brown and black.
With white spots made using a paint pen.
The petals are the two yellows with a hint of pink and brown for the shadows.
I cut the flower out with scissors and inked the edges with the lime green marker after gluing it together.
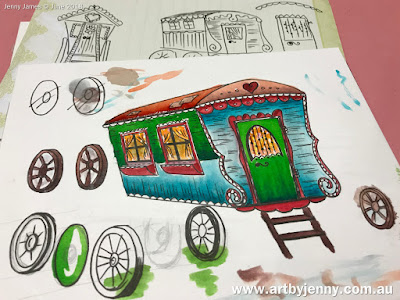
I used Google for help on how a wagon should look, making my own a mix of all I saw that had wooden spoked wheels and fillagrees. I like wooden wheels. Many modern wagons I found had car tyres that while practical, are simply not beautiful.
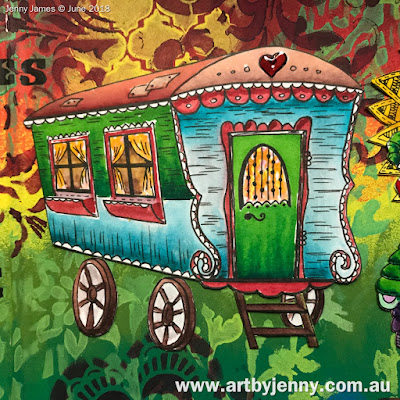
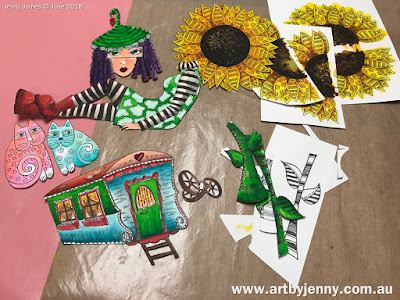
Sometimes things look so much better after they're cut out... The flower stems are from "Everything's Rosy" and the two adorable cats are stamps by Laurel Burch (Stampendous).
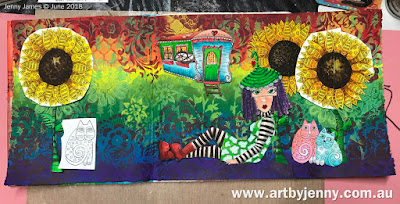
Do you ever find it can take ages to finally decide where everything should sit?
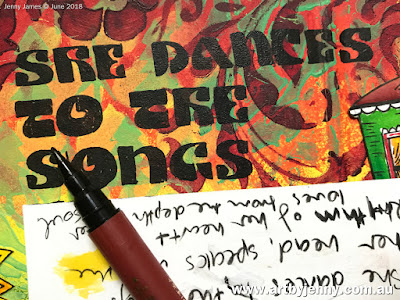
Ink now, worry later! lol :) I find if I fluff about too much with pencil before I put the ink down, I have too many eraser marks on the artwork.
I practiced in my Dyary first (its such nice drawing paper, see below), then used a bit of scrap with the quote scribbled down, as a guide for the size and keeping it straight (ish).

The lettering is from an old book I've had since I was in high school "The Lettering Book" by Noelene Morris (top right, its a bit tired). I flicked through a few and settled on an old favourite Noelene called "Mod Ombre".
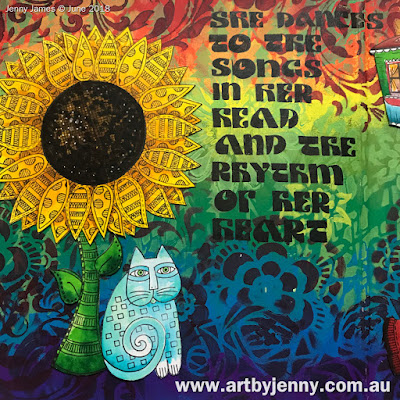
"She dances to the songs in her head
and the rhythm of her heart."
The actual quote I found said "She dances to the songs in her head, speaks with the rhythm of her heart, and loves from the depth of her soul." By the time I got to "head", it was clear I was going to run out of space.
I'm happy with how it turned out and thoroughly enjoyed the whole process, from looking up variations of gypsy wagons to washing my stencils and stamps. Every part of creating an artwork is a wonderful thing... how it turns out is such a fabulous bonus!
Thanks so much for reading about my page for Louise. I hope it made you smile!
Have you used these stamps or paints in art? I'd love to see it!
Add @Art.by.Jenny or #ArtbyJenny to your Instagram post if you feel like sharing :D
Have a happy creative day!
:)
Jenny
