How to Create an Underwater Garden for an Octopus
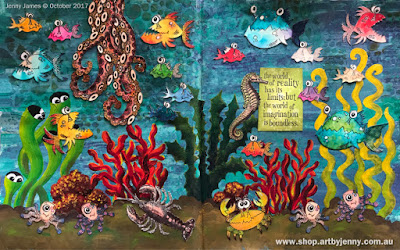
I do love Dyan Reaveley's adorable fish, octopus and crabs with their cheeky attitudes! They're just so much fun to stamp, colour and cut out. Here I've used them to create an underwater garden for an octopus (he's too big for the scene, so is hanging around the top of the page).
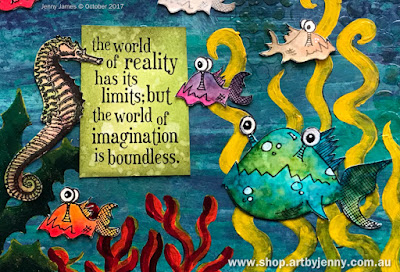
Swimming along with these creatures are a seahorse and lobster from the Tim Holtz Cling Stamps - Sea Life. The quote is from the Tim Holtz Cling Stamps - Stuff to Say.
- Acrylic Paints
- Archival Ink (I used 'Jet Black')
- Paint Brushes and Blending Tools
- Dylusions Stamps (I used "Under the Sea", "Ocean Backgrounds" and "Flight of Fancy")
- Tim Holtz Cling Stamps - Sea Life
- Tim Holtz Cling Stamps - Stuff to Say
- Stencils and Masks
- Tim Holtz Non-Stick Micro-Serrated Mini Snips
- Jane Davenport Mermaid Markers (watercolour ink brush pens)
- Gansai Tambi Watercolour Paints
- This link is to everything labeled "Under the Sea" (might be useful)
- Dylusions by Dyan Reaveley Mini Collage Glue Stick - 3 Pack
- Tim Holtz Distress Ink Pads
- Ranger Transparent Gloss Texture Paste
- Dylusions Acrylic Art Journal Block
- Other Stamping Accessories
I keep all extras in a tray to wander through now and then. All get used eventually, on cards, ATCs and other journal pages.
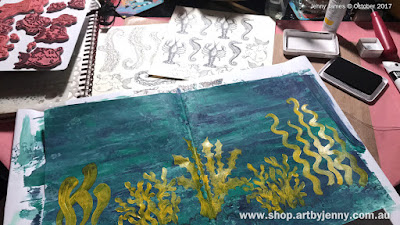
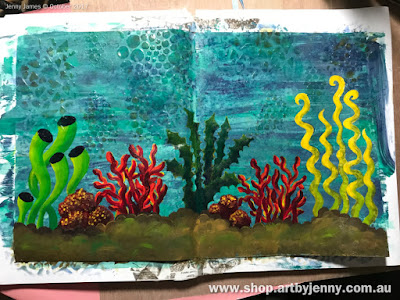
The background was created using 2 colours of acrylic paint (dark and light blue, use whatever paints and colours you wish). Using a rubber roller (brayer), paint was applied and rolled back and forth until I liked what I saw, then dabbing with a sea sponge to break up all the lines.
There isn't a photo of this technique in action, only the above photo of the dried paint with the plants already started.
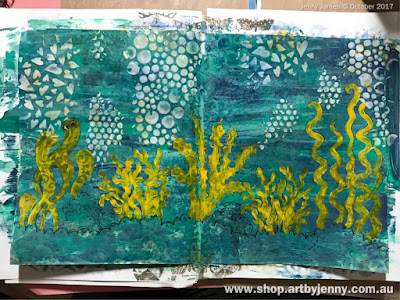
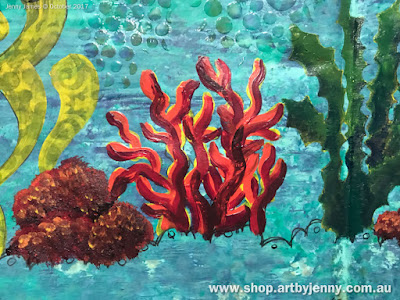
The seaweed, coral and ground (scalloped sea floor) were stamped directly onto the page using the Dylusions Ocean Backgrounds Stamp Set. After altering the plants and drawing more elements with a black marker, they were then painted with yellow acrylic paint.
I probably should have waited for the page to dry properly before I continued, but I went straight on with it and used Distress Inks with an ink blending tool and a bunch of different stencils - all of which disappeared as it dried except a few that were over the yellow plants. I was having a lovely time, layering and inking so while you can't see anything, it wasn't totally wasted!
Still not waiting for layers to dry, I added a few patches of hearts and bubbles with Transparent Gloss Texture Paste, wiping it through the stencils using a spatula. Not waiting for the ink to dry caused all my texture paste to get a yellow and blue glow, proof that the Distress Inks were definitely on the page.
It was cool watching the texture paste dry as I painted all the scenery... magical almost!
I painted the plants using a brush with just the basics, white yellow, red, blue, purple and black acrylic. The sea floor was sponged using a homemade mix of browns and greens (whatever was left on my plate after painting the plants).
It was a couple of days before I could get back to it, so by the time I gathered my fish, crabs, seahorse, lobster and other creatures to colour, the background was well and truly dry.
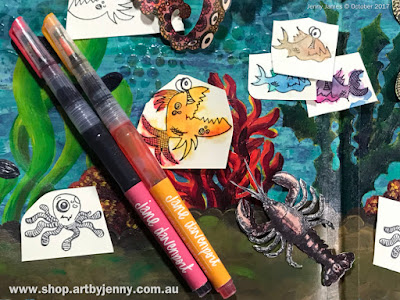
I've coloured the critters using the Jane Davenport Mermaid Markers and Gansai Tambi watercolour paints, then covered most of them with a coating of iridescent medium to give an extra bit of shimmer.
I usually colour stamped images before trimming, then apply ink around the edges (using the ink blending tool) hiding the white paper.
The inked edges seem to lift them off the page better, giving a bit of definition to their outline. On really tiny pieces, I use markers or pencils to ink the edges either in colours to match the background or the images themselves. Use whatever feels right or what makes you smile :)
Placement was fun... they kept moving around when I bumped the page! The photo above was taken while I was deciding if I needed to colour more or start cutting out. The photo below shows all the critters slowly being cut out and stuck down.
The sign was stamped in black Archival ink then blended around the edges (and some in the middle) using the Peeled Paint (green) Distress Ink (with an ink blending tool) and splattered to give a bubbly look.
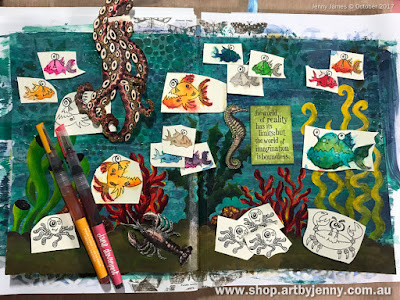
Well, its taken a fathom of text (I know but it couldn't be helped! lol) but here it is (above), the finished page of my octopus's garden.
You may have noticed that all eyes and expressions have been altered from the stamps, creating both happy, excitable and nervous creatures. I've used white and black paint pens to do this as well as redraw some of the linework that was covered with paint.
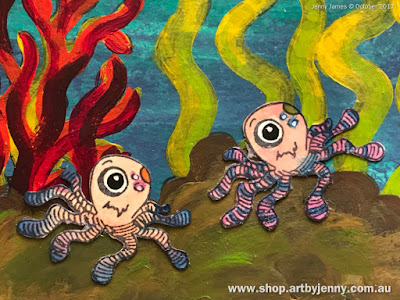
These little guys are blue ringed octopus all the way from South Australia, friends of the giant octopus who claims this garden as his own. Dad came along while I was taking these pics, looking for the yellow submarine...
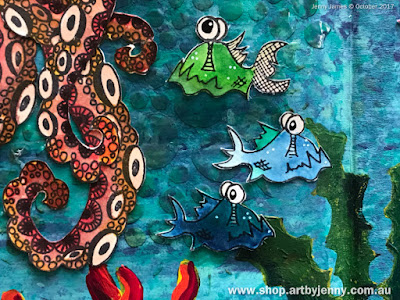
As the little fish swim around the giant octopus' tentacles, they have to change colour so as to stay hidden from being someone's lunch!
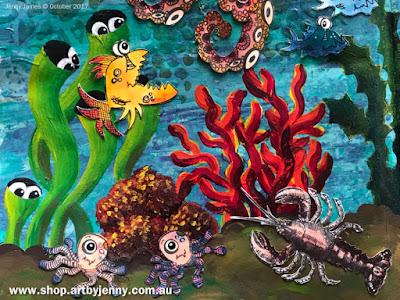
The sandworms like to hide inside their bright green tubes as they watch the others swim about the garden. A small fish should be smarter than to go after something as big as this octopus, unless he's chasing the dark blue fish...
I'm so grateful to Lousie (AAJS) for organising the journal swap and to Danie, who's theme and book it was that allowed me to enjoy such a magical journey. It was so much fun :)
I hope this art journal page inspires you to have a go, whether an underwater world or you give them wings! If you have questions or need a hand, sing out anytime :)
Remember, the world of reality has its limits, but the world of imagination is boundless.
Have fun!
:D
Jenny
This is an edited version of the blog post I wrote for the Australian Art Journal Swap in 2017.
Swimming along with these creatures are a seahorse and lobster from the Tim Holtz Cling Stamps - Sea Life. The quote is from the Tim Holtz Cling Stamps - Stuff to Say.
List of treasures to recreate this page...
- Art Journals or use blank paper (my page was approx A3 in size)- Acrylic Paints
- Archival Ink (I used 'Jet Black')
- Paint Brushes and Blending Tools
- Dylusions Stamps (I used "Under the Sea", "Ocean Backgrounds" and "Flight of Fancy")
- Tim Holtz Cling Stamps - Sea Life
- Tim Holtz Cling Stamps - Stuff to Say
- Stencils and Masks
- Tim Holtz Non-Stick Micro-Serrated Mini Snips
- Jane Davenport Mermaid Markers (watercolour ink brush pens)
- Gansai Tambi Watercolour Paints
- This link is to everything labeled "Under the Sea" (might be useful)
- Dylusions by Dyan Reaveley Mini Collage Glue Stick - 3 Pack
- Tim Holtz Distress Ink Pads
- Ranger Transparent Gloss Texture Paste
- Dylusions Acrylic Art Journal Block
- Other Stamping Accessories
Instructions...
As usual, I stamped out more than I needed onto Dylusions Mixed Media Paper (see below), using black Archival ink and an Acrylic Journal Block.I keep all extras in a tray to wander through now and then. All get used eventually, on cards, ATCs and other journal pages.
The background was created using 2 colours of acrylic paint (dark and light blue, use whatever paints and colours you wish). Using a rubber roller (brayer), paint was applied and rolled back and forth until I liked what I saw, then dabbing with a sea sponge to break up all the lines.
There isn't a photo of this technique in action, only the above photo of the dried paint with the plants already started.
The seaweed, coral and ground (scalloped sea floor) were stamped directly onto the page using the Dylusions Ocean Backgrounds Stamp Set. After altering the plants and drawing more elements with a black marker, they were then painted with yellow acrylic paint.
I probably should have waited for the page to dry properly before I continued, but I went straight on with it and used Distress Inks with an ink blending tool and a bunch of different stencils - all of which disappeared as it dried except a few that were over the yellow plants. I was having a lovely time, layering and inking so while you can't see anything, it wasn't totally wasted!
Still not waiting for layers to dry, I added a few patches of hearts and bubbles with Transparent Gloss Texture Paste, wiping it through the stencils using a spatula. Not waiting for the ink to dry caused all my texture paste to get a yellow and blue glow, proof that the Distress Inks were definitely on the page.
 |
| Transparent Gloss Texture Paste ... wet. |
 |
| Transparent Gloss Texture Paste ... dry. |
I painted the plants using a brush with just the basics, white yellow, red, blue, purple and black acrylic. The sea floor was sponged using a homemade mix of browns and greens (whatever was left on my plate after painting the plants).
It was a couple of days before I could get back to it, so by the time I gathered my fish, crabs, seahorse, lobster and other creatures to colour, the background was well and truly dry.
I've coloured the critters using the Jane Davenport Mermaid Markers and Gansai Tambi watercolour paints, then covered most of them with a coating of iridescent medium to give an extra bit of shimmer.
I usually colour stamped images before trimming, then apply ink around the edges (using the ink blending tool) hiding the white paper.
The inked edges seem to lift them off the page better, giving a bit of definition to their outline. On really tiny pieces, I use markers or pencils to ink the edges either in colours to match the background or the images themselves. Use whatever feels right or what makes you smile :)
Placement was fun... they kept moving around when I bumped the page! The photo above was taken while I was deciding if I needed to colour more or start cutting out. The photo below shows all the critters slowly being cut out and stuck down.
The sign was stamped in black Archival ink then blended around the edges (and some in the middle) using the Peeled Paint (green) Distress Ink (with an ink blending tool) and splattered to give a bubbly look.
 |
| Its all coming together nicely :) |
You may have noticed that all eyes and expressions have been altered from the stamps, creating both happy, excitable and nervous creatures. I've used white and black paint pens to do this as well as redraw some of the linework that was covered with paint.
These little guys are blue ringed octopus all the way from South Australia, friends of the giant octopus who claims this garden as his own. Dad came along while I was taking these pics, looking for the yellow submarine...
As the little fish swim around the giant octopus' tentacles, they have to change colour so as to stay hidden from being someone's lunch!
The sandworms like to hide inside their bright green tubes as they watch the others swim about the garden. A small fish should be smarter than to go after something as big as this octopus, unless he's chasing the dark blue fish...
I'm so grateful to Lousie (AAJS) for organising the journal swap and to Danie, who's theme and book it was that allowed me to enjoy such a magical journey. It was so much fun :)
I hope this art journal page inspires you to have a go, whether an underwater world or you give them wings! If you have questions or need a hand, sing out anytime :)
Remember, the world of reality has its limits, but the world of imagination is boundless.
Have fun!
:D
Jenny
This is an edited version of the blog post I wrote for the Australian Art Journal Swap in 2017.
