
No Method Just Madness - Arty Journal Page
I really have no method, just madness!
This vivid page was created over Easter 2025 inside my Dylusions Ledger Journal using a gel plate, Dylusions stamps, Archival Ink Pads and Dylusions Ink Sprays (applied using brushes).
I started one day stamping the two heads from 'High Tea' and the 'Hunny Bunny' body (flipped on the gel plate) then turned the pots into coffee mugs. Next, I stamped cats, the sun, a few bees, and some background patterns and then coloured it all in the next day.
arty treasures used ...
- Gel printing plate, 5x7 or 6x6 inch size (smaller is easier to hold and flip over).
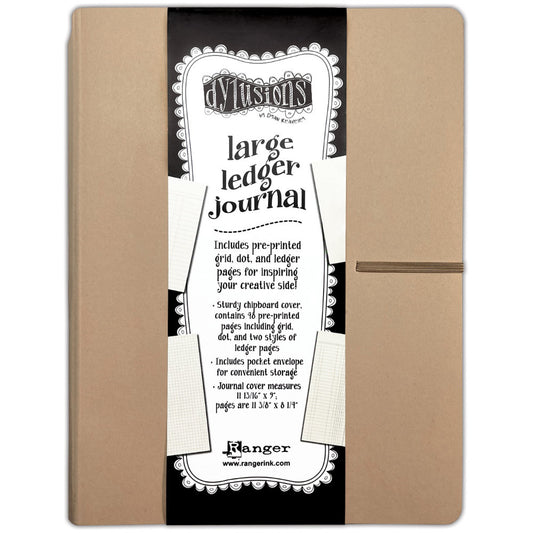
- Dylusions Ledger Journal 9x12.
- Spare sheets of smooth watercolour or mixed media paper to stamp extras.
- scrap paper to make masks.
- Acrylic stamp blocks, various sizes and 7x7.
- Tim Holtz Tonic Studios White Glass Mat.
- Ranger Archival Ink Pad - Jet Black or Tim Holts Distress Black Soot or (mini) Dylusions Black Marble.
- Ranger Archival Mini Ink Pads (for the background) - Speckled Egg, Salvaged Patina.
- Tonic Studios Tim Holtz Recoil Snips.
- Dina Wakley MEdia Neon Scribble Sticks.
- Tim Holtz Distress Pencils.
- Dyan Reaveley Dylusions Ink Sprays.
- Princeton Paintbrush, Long Round no.6.
- Fine black marker (doodling).
- White gel pen or fine white paint pen (highlights).
- Paint palette, inkwells filled with Dylusions inks.
Dylusions stamps - High Tea, Funny Bunny, The Cat and I, Toadstool Town, Foliage Fillers, No Place Like Gnome, Churchill and Friends, Thoughts in my Head, Stripy Curlicues, Get Your Rocks On, Full Blown Circus.

How this page was made ...
I didn't start with a plan, I stamped the two heads from 'High Tea' first and then decided which bodies to use. I chose the 'Funny Bunny' as it fitted better being that they were sitting down. Before cutting out it out, I drew on a handle, turning the pots into mugs.
To make one body face the other direction ... place your gel plate onto a large stamping block so you can pick up and print the image. It is easier than flipping the book onto the gel plate, mostly so you can see where you are printing, but also the smaller gel plate is lighter to pick up and flip.
With your rubber stamp on another stamp block, ink it up with black Archival ink then press lightly and evenly onto the gel plate. Pick up the gel plate, flip over and print onto your page. Maybe practice a few times so you can gauge how hard to press or how fast you may need to work - some climates will make ink dry faster. Whether the printed image is sharp and black or shadowed and grey, it will be an image perfectly good to use - once you add colour, any faults you see (that noone else will see) will be merged into the completed picture.

Stamping and building up the page ...
For my page, I stamped one sitting body with the gel plate, then the second one on a spare sheet of mixed media paper. This second one was cut out and glued in place onto the page. A spare cupcake earring was also stamped, cut out and glued in place.

Another way for layering stamped images ...
Rather than cutting out another body to stick over the top (so one looks like it is behind the other), why not create a mask!
To do this, stamp the foreground image first on the page and also on scrap paper. Cut out the scrap paper for the mask and place it over the image on the page. Anything stamped over the mask will appear to be behind the first stamped image. Save the mask for another day :)
Stamping and Colouring a Fun Scene ...
Continue with the scene using the quote, bees, cat, foliage for the cat to sit on (use a mask over the cat before stamping the leaves), a sun and the adorable sleeping cat, all in black Archival ink.

Using the two beautiful blue Distress Archival Inks, print a variety of patterns throughout the background, wherever you wish. Use scraps of paper as masks to cover over areas you don't want to print, eg, over the hairdos and the quote.
I started colouring the page using Dina's neon crayons (cupcake earrings and the sun) but the next day I decided to colour in with Dyan's Dylusions sprays (what I use totally depends on how I feel, add colour however you wish using all your favourites).
I carefully poured some of each using an eyedropper into the wells of my paint palette - Dirty Martini, Mushy Peas, Chopped Pesto, Polished Jade, Lemon Zest, Pure Sunshine, Tangerine Dream, Postbox Red, Rose Quartz, Pink Flamingo, Laidback Lilac, Calypso Teal, London Blue, Desert Sand.

A more efficient way to colour in with Dylusions or Distress sprays would be to fill a stack of Tim Holtz Waterbrushes with each colour. It saves time as you're not needing to pour inks each session and saves ink from being added to either an accidental or clean up page (or thrown out). Use a Sharpie or sticker labels to write the names on each one.
Dyan has been doing this for years, using one brush for every colour of ink. You could always fill brushes with just your favourites that you use often... yeah, nah I've not done this either (yet) but have finally decided that I will.
Sometimes it takes a while to decide these things... and save up! Use cheap brushes if you must, but Tim's do not leak and have a beautiful flexible fine nib and last many years! Refillable brush markers :) Make sure you only fill with watersoluble inks that do not contain powders, mica or pigments as they may block the valve.

No photos of the various colouring layers this time, I was so engrossed in it all that I forgot! Which is great really :) Purple cats too, just because.
Remember to let areas dry before adding more wet ink nearby or it may blend...! Distress pencils were also used for shading, shadows and enhancing various areas.

Use whichever colours you wish! Remember with Dylusions Inks, use water and a dry piece of blotting paper (paper towel, tissue, cloth or rag) to lift excess ink to lighten the tone.

The background was painted with a wash of London Blue (a drop of ink with a few drops of water) in the top two thirds of the page, around the yellow sun and other shapes. A wash of Mushy Peas was blended over the lower third of the page.
The above and below photos shows a closer view of how much I watered down the normally vibrant ink.

Once everything is dry, add some doodled marks with black and white pens. White spots in eyes to give life and white markings for highlights to define shape. I drew wings to a sitting bee, added marks into the jacket squares and also on the jackets, I added scallop and beaded edging. The two mugs had the spotty swirl stamp (Stripy Curlicues) printed in Salvaged Patina on their bases.

I hope this page, while fairly chaotic, inspires you to have a go using your favourite stamps with gel printing plates and all the colours of the rainbow! Have fun with it, art is so good for rejuvenating the heart, mind and soul.
Happy Arty Day!
:)
Jenny