Twilight Pumpkin Patch
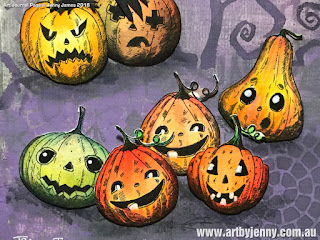
These totally adorable Tim Holtz Pumpkinhead Stamps (CMS309) were happily growing in the veggie patch when a flock of ravens flew in for dinner.
Not many photos were taken when I created this art journal page but these will hopefully give you an idea on how to create your own twisted wild garden. Enjoy :)Treasures used...
- Jane Davenport Mixed Media Journal - 6x9in
- All blank art journal books
- Strathmore Art Paper Watercolour - Series 500 Hot Press - 8x10
- All Strathmore's watercolour paper
- Tim Holtz Cling Stamps - Pumpkinhead
- Tim Holtz Cling Stamps - Ravens
- Archival Ink Pad and Reinker Set - Jet Black
- Dylusions Acrylic Paint
... I used Laidback Lilac, Slate Grey, Black Marble.
- Tim Holtz Layering Stencils
... I used Mosaic, Tinsel, Twisted Branch, Pines, Flames.
- Ink Blending Tool - Mini Round Foam - 2 Tools
- Tim Holtz Mini Snips - Non Stick Micro Serrated Scissors - 5 inch
- Watercolour Paints
- Zig Watercolor BrusH2O Long Waterbrush - Medium Tip
- All paint brushes and blending tools
The Background...
I used a damp fine cloth (you could use a wet wipe or babywipe) and smooshed Dylusions Acrylic Paint in Slate Grey over the whole surface of the page. Simply dip the cloth in the lid of the jar to pick up a spot of paint (its easier to collect a small amount if you're not dipping into the jar) and wipe over the page... doesn't have to be perfect or even.You could use a soft piece of silk if you wanted a reusable wet wipe - it needs to be damp almost dry, not wet.
Anything thicker than silk will soak up the paint instead of allow it to blend over the surface. Tissues and kitchen paper towel, while quick and easy, often fall apart leaving fluff and bits everywhere and will to soak up the paint.
Or use a paint brush, roller, brayer, blending tool, foam block, sea sponge, your fingers... really, you can use anything for blending colour over a background.
So, can you image a patchy plain grey page? Cool :)
Next, I applied the pastel purple paint, Laidback Lilac with a 2" wide rubber brayer (also called a roller). Use the wet wipe you've just put down to collect a dob of purple paint from the lid and put on your craft sheet, paint palette or scrap paper. Roll the brayer into the paint and then roll over the grey page. I went up and down, then across back and forth. Using the now grey-purple cloth, I blended around all 4 sides of the page.
Another reason to take paint from the lid, so you don't mix up your paints when doing things like this! Especially when using white or yellow after any other colour.
I chose a few Tim Holtz Stencils to match my theme of a wild twisted garden and blended through them using an Ink Blending Tool (with the round foam), alternating between the Slate Grey and Laidback Lilac paints, mixing the colours together more and more as each stencil design was added.
I added Black Marble at one point (see the Mosaic) but it was too dark. Easily fixed by adding a grey layer after it dried.
The Pumpkins and Ravens...
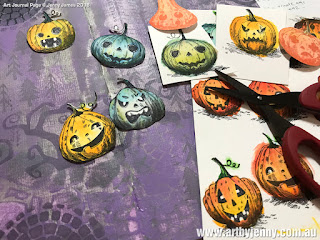
I've used Strathmore's hot-press watercolour paper for all the pumpkins and ravens, printing with Ranger's Jet Back Archival Ink Pad then left to dry for a few minutes. As you can see in the above photo, I also use an orange ink pad but didn't like how it looked.
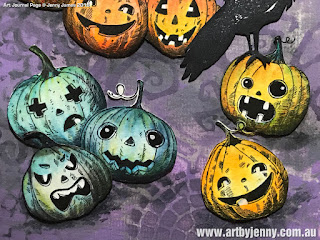
All pumpkins were coloured using watercolour paints in yellow, orange, red, blue, green... bit of a mix and match technique! All were cut out by hand using scissors then glued onto the page as shown in the photos.Here's how you can recreate them at home :
- Blue pumpkinheads : light blue watercolour paint all over, while still wet (so the colours blend) apply a darker blue only around the outside of the pumpkin and stalk. Tip areas with yellow to give them a green tinge.
- Green pumpkinhead : paint pale yellow all over and while still wet, apply blue around the outside of the shape.
- Yellow pumpkinheads : paint all over with either light yellow then (while wet) add either orange or blue around the edges.
- Orange pumpkinheads : colour all over with dark yellow and blend around the outside using red or dark orange.
Basically... start light and add darker colours gradually. Working while the paint is wet enables the colours to blend as they dry. If you want a more layered look, wait for each colour to dry before adding the others.
Stick to the colour groups for best results - warms with warms, cools with cools - or you may end up with muddy colours or brown (unless you want a muddy brown!).
Experiment and see what combos you come up with that make you smile!
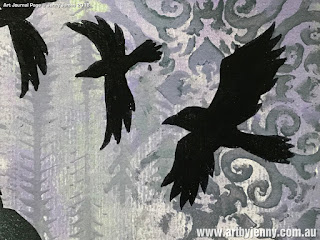
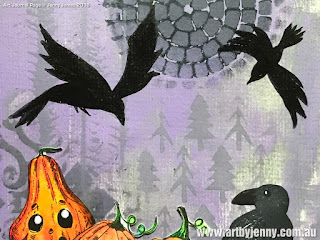
The birds are all stamps too. The flying ravens were stamped directly into place using the black Archival ink, then overpainted using Dylusions black paint.
The two standing ravens were stamped onto watercolour paper using black Archival ink then fussy cut using scissors. Their edges were inked in black before being glued in place. I used Dylusions Glue Stick for adhering everything in place.
You could save time by using the Tim Holtz Thinlits - Die Cutting Set by Sizzix - Feather and Ravens to cut out a whole flock of ravens. Either use black paper or card or colour it black before or after you cut out the birds.
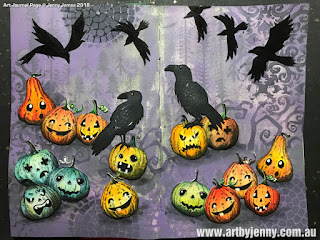
Here is the finished art journal page, 22.5cm x 29cm wide. I've placed the pumpkinheads in groups so they can chat and laugh together while the birds circle overhead. I expect the grumpy ones know they're on the menu or are just annoyed that someone with sharp talons is on their head!
I hope this fun page inspires and helps with your creative journey. Sing out if you have questions or need a hand, I'm here to help. Have fun!
Have a happy creative day!
:)
Jenny
