The Magical and Mystical Cheshire Cat
 |
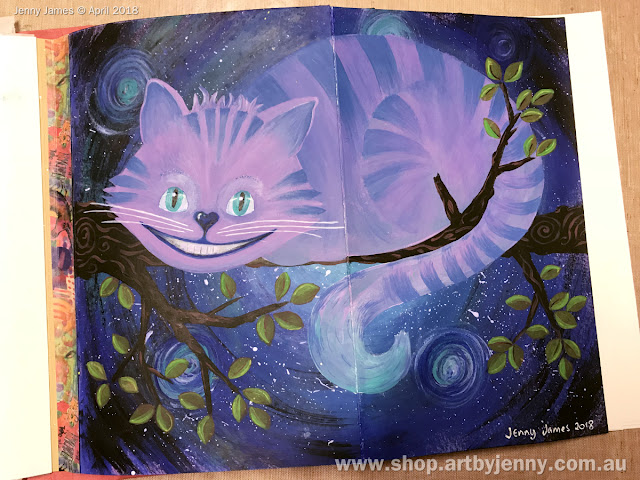
| Above : the one, the only, the amazing Cheshire Cat! |
Painted by hand with only a few treasures : Dylusions acrylic paint, gesso, paint brushes, watercolour pencils for sketching out the cat and coloured pencils for my initial drawings, when choosing a colour scheme. Plus you'll also need a Dylusions Large Art Journal :)
Background Colour List:
- After Midnight (dark blue)
- Laidback Lilac (pretty purple)
- Vibrant Turquoise
- Black Marble
- White Linen
Tree Colour List:
- Ground Coffee (dark brown)
- Melted Chocolate (medium brown)
- Dirty Martini (earthy olive green)
- Lemon Zest (bright yellow)
- Cut Grass (bright green)
Cheshire Cat Colour List:
- White Gesso
- Laidback Lilac
- Vibrant Turquoise
- Black Marble
- White Linen

Free Template For You:
I've had a few requests to draw the Cheshire Cat for colouring and using as a template, so here he is. I hope this helps you have a go at painting your own cat.
To download and print your free template:
- tap the grinning cat outline;
- it should open a jpeg in a new window;
- press "print", adjusting the specifications in your printer menu if required.
- colour the page, paint the page or transfer into your journal.
To transfer into your art journal:
- the old-school way was to use a soft lead pencil (2B or 4B);
- hold the paper against the glass of a window (or a lightbox), white / back facing you;
- using a soft graphite pencil (2B or 4B) colour along all the lines you want to transfer;
- place the paper (scribble side down) over your page;
- using a hard graphite pencil (HB or 2H) trace along all the lines you want to transfer;
- lift the paper and your outline should be on your page;
- it should show enough to give you a guide for painting.
- its a good idea to practice first when trying something new :)
Have fun!
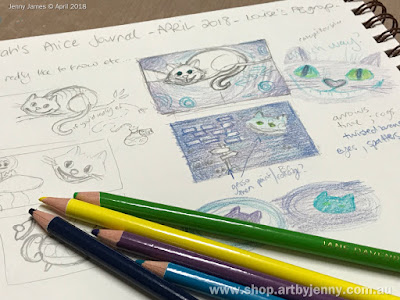
How I started ... Scribbling out thoughts, deciding upon design, characters and choosing colours. So many fantastic characters from these books that are fun to portray in art!The final design is based upon the original sketch of the Cheshire Cat by John Tenneil when he (CC) was telling Alice the best way to go.
I was going to add a quote but forgot all about it after I started the actual painting! lol :)
I remembered after I posted the book so its a journal page without a written message. All is not lost, after 150 years of Alice, I think most of us know a few favourite quotes from the Cheshire Cat so quite possibly think of them whenever the cat is around.
For instance “If you don't know where you want to go, then it doesn't matter which path you take.” or “I am not crazy, my reality is just different from yours.”
Step one... The Background
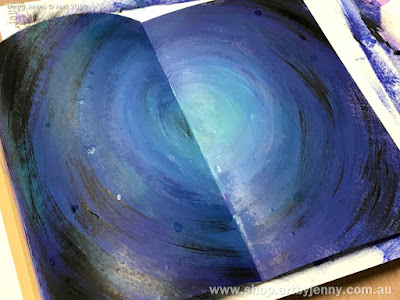
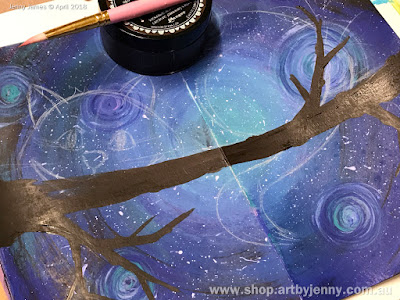
Round and round and round I went with the paintbrush ... layers of purple, dark blue then turquoise, more dark blue and lightly with the black. I then added white splatters using a Tim Holtz Splatter Brush... dip in the paint and flick towards the page. Creates much less mess than using an old toothbrush!
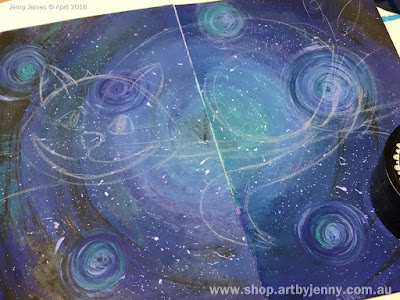
The spirals are made up of the same colours, swirling around and around with a small round brush until they looked like mini abstract galaxies.
Tip... Wait until the background is completely dry before drawing in watercolour pencil. Dylusions Acrylic Paint is permanent once dry, so if you make a mistake, it can be wiped off easily with water (damp cloth) - without ruining your beautiful background.
Step Two... The Tree
Freestyle with a flat brush using Ground Coffee and embellished with Melted Chocolate swirls... sounds delicious! Coffee and chocolate always go great together!
Quite a nice combo, the two browns. Pre-mixed colours make painting much easier. Not only does it use less paint but it means you don't have to worry about needing to match the colour if you want to use the same colour another day.
That said, I do love mixing colours, even just adding a smooch of white or spot of black to anything makes me smile...
The leaves were painted in layers, one colour at a time. First I painted all the leaves with Melted Chocolate, then half of each leaf with Dirty Martini (yummy earthy green, my fave). Dylusions paint allows the colours underneath show through which helps add depth and extra dimension.
Next I added a line of Lemon Zest (yellow) along one side of each leaf then waited for them to dry before painting over the same side of the leaf with Cut Grass (bright green). To finish the leaves off, I added a line down the centre with brown.
Step Three... the Cheshire Cat Himself
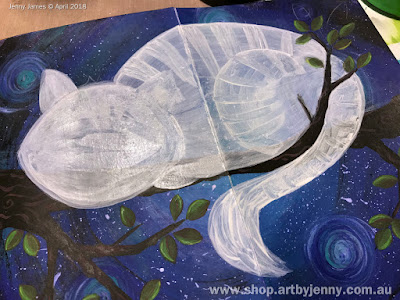
I painted his basic shape in a smooth and creamy white gesso. I painted his stripes and features a few times to get the shape and stripes looking how I wanted.
Once the white shape was ingrained into my head (don't ask), I put some Laidback Lilac and Vibrant Turquoise on the palette paper (or use a craft mat) and mixed part of each to get a blue-purple mixture. The darker splosh is from adding dark brown (but I didn't use it).
I painted the whole cat in the purple and blue, then where the colours met, blended it with the blue-purple mixture.
I should mention that I don't clean the paint brush inbetween the purple and blue... which why having a palette is so important - it keeps your pots of paint clean :)
Don't forget, if you use wide opening pots of acrylic paint like Dylusions old jars (they're in bottles now), and live in warm dry climates like Australia, its a good idea to add a spritz / mist of water into each pot of paint after the day's session. This puts back any moisture that evaporated while the lid was off. I didn't do this with my black and it looks like black cottage cheese! lol :)
The colour combination makes it look mystical and magical, almost glowing :) Pretty cool hey!
I swapped between a flat brush and round brush back and forth to paint the stripes and details.
A splash of white, dash of black, smoosh of turquoise and he's a completed cat. Wasn't quite as fast as all that but once his stripes were brushed into place, the face came together wonderfully. I used the dark blue and black for his nose and mouth, white with a hint of black and purple (tiny hint) for the teeth and eyes. Made the whiskers and highlights appear even brighter!
Finally, to tidy up the left hand side edge, I added a strip of Jane Davenport Washi Tape.
If using Ink Sprays to create the background instead of paint - don't be afraid to use alot of ink. That's how those vibrant rich backgrounds by Dyan Reaveley are created. Divide your page into 6ths (3 down, 2 across) and put 3-6 sprays of each colour in each section. While wet, either close your book or press on spare paper to create "accidental pages" for another day. Let both dry before adding other layers. Less ink used gives a spattered, white spotty look - which is fine if that's what you're after. Dyan also uses a kitchen paper roll to soak up excess ink (sometimes leaving pretty patterns in the colour). The colourful kitchen paper can be then be used for collage. Nothing need ever be wasted :)
Thanks so much for reading this blog post :) Hope my Cheshire Cat inspires you to get arty and crafty! If you need a hand with anything arty, sing out anytime. I'm here to help :)
Happy Creative Day!
:D
Jenny
